How to create a slideshow using JQuery and Rails in 10 minutes or less
Today I want to demonstrate a JQuery slideshow tool that my friend Daniel Higginbotham wrote: Electric Slide. It’s tremendously simple to use, while still providing ways to customize and adapt its behavior as you need to.
Suppose you have a long series of slides containing text and/or images that you want to display as a slideshow on a web page; let’s use these Mickey images as an example:

You might represent these slides using a Rails ActiveRecord model called “Slide.” If you had one image per slide you could attach it to the slide model with Paperclip:
class Slide < ActiveRecord::Base
  has_attached_file :image
end
|
The simplest way to display all of these would be to draw a single vertical column on a web page and let the user scroll down to view all of the slides: <% @slides.each do |slide| %> <%= image_tag slide.image.url %> <br/> <% end %> However, scrolling can be annoying especially if there are many images or a lot of text. Also, this isn’t a slideshow. I don’t see each image in the same location as the previous one. It’s harder to notice changes between the slides and also harder for me to surprise the user with something funny or unexpected in the following slide since they are all immediately visible. |
 |
Another simple solution would be to display each slide on a separate page and provide next/previous links, using code similar to this:
 |
<%= image_tag @slide.image.url %> <br> <%= link_to 'Prev', @slide.higher_item unless @slide.first? %> <%= link_to 'Next', @slide.lower_item unless @slide.last? %> |
But this is also annoying since each click takes the user to a separate page, changing the URL and also adding to the browser’s history list. Since all of these images are part of a single presentation I’d like to display them on one page. Additionally I have to write all of the navigation code: I might use acts_as_list in my model class like in the ERB snippet above, and then write the HTML to display the next/prev links in the proper location, to hide them when necessary, to give them the proper styling, etc. In other words, it’s a fair amount of work.
Electric Slide
Electric Slide to the rescue! If you install Daniel’s Electric Slide JQuery code file in your app, all you have to do is use a <div class=“slide”> tag around each image or whatever slide content you have, call a JQuery function when your page is loaded and Electric Slide will take care of the rest:
<script type="text/javascript" charset="utf-8"> $(function(){ $("#slides").electricSlide(); }) </script> <div id="slides"> <% @slides.each do |slide| %> <div class="slide"> <%= image_tag slide.image.url %> </div> <% end %> </div> |
 |
With just a little bit of CSS love, the slideshow can look like this (click through the screen shot to see a working example):
body { background:#EEEEDD; } .slide { display:none; } #slides .slide-header { display: none } #slides .slide-footer { margin:0; width: 200px; } .slide-footer .previous { width:75px; float:left; } .slide-footer .next { width:75px; float:right; text-align:right; } |
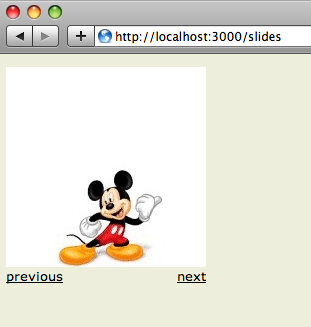 |
Now all the slides are displayed in a working slideshow inside my single web page! When I click on the previous or next links, I can watch Mickey move around without leaving the page. Let’s take a look at how my ERB and CSS code works and what Electric Slide is doing:
- First I’ve identified each of my slide’s content using <div class=“slide”>. I just included that in my iteration over the slide array. For me, each of these <div> tags contains a Mickey image, but they could contain any HTML content you would like.
- Note I set “display: none” for the “.slide” style so the slides are initially hidden. This is required by Electric Slide, or else all of the slides will appear initially visible.
- Next I added an on-load handler using JQuery syntax: $(function(){ …. }). JQuery will call this code when the page finishes loading.
- In the on-load handler, I call the electricSlide function on my <div id=“slides”> parent object. This initializes Electric Slide. There are many options I could have passed in here, but today I’m just using all of the default values. Check out Daniel’s github repo for documentation and examples for more info on what to pass in here.
- Electric Slide counts up the slides, and displays “previous” and “next” links for each one as necessary. I don’t need to worry about writing code to display the links or handle clicks on them: the navigation just works.
- Electric Slide also creates <div> tags automatically to hold the previous/next links, these are called <div class=“slide-header”> and <div class=“slide-footer”>. I’ve styled these using CSS to hide the header and to align the links with the edge of the image in the footer.
Detailed step-by-step example
Let’s create a new Rails app from scratch, copy the mickey images into it, install Electric Slide and then display them all as a slideshow… all in 10 minutes or less!
$ rails mickey-slides
$ cd mickey-slides
Go ahead and download the Mickey images from my site; or feel free to use any images you have instead:
$ curl -O https://patshaughnessy.net/assets/2010/4/28/mickey-images.tar.gz
$ tar zxvf mickey-images.tar.gz
images/
images/mickey1.jpg
images/mickey2.jpg
images/mickey3.jpg
images/mickey4.jpg
images/mickey5.jpg
images/mickey6.jpg
Now let’s use View Mapper to create my slide model with an “image” attachment:
$ sudo gem install view_mapper
$ ./script/generate scaffold_for_view slide --view paperclip:image
       error  The Paperclip plugin does not appear to be installed.
Oh yea… I forgot to install Paperclip; let’s do that now also and then repeat the View Mapper command:
$ ./script/plugin install git://github.com/thoughtbot/paperclip.git
$ ./script/generate scaffold_for_view slide --view paperclip:image
$ rake db:migrate
Next let’s load the images into our database using Paperclip in the Rails console:
$ ./script/console
Loading development environment (Rails 2.3.5)
>> Dir.glob('images/*.jpg').each do |filename|
?> Slide.create :image => File.new(filename)
>> end
=> ["images/mickey1.jpg", "images/mickey2.jpg", "images/mickey3.jpg",
"images/mickey4.jpg", "images/mickey5.jpg", "images/mickey6.jpg"]
Now we just need to install Electric Slide – let’s just get Daniel’s entire github repo including the examples and documentation:
$ cd ..
$ git clone git://github.com/flyingmachine/electric-slide.git
$ cd mickey-slides
And now let’s replace our default Rails prototype javascript files with JQuery and the Electric Slide code from Daniel’s repository:
$ rm -rf public/javascripts
$ cp -r ../electric-slide/javascripts public/javascripts
Now edit app/views/layouts/slides.html.erb and include Electric Slide, JQuery and a new style.css file by replacing the existing stylesheet_link_tag ‘scaffold’ line with the lines highlighted below:
<!DOCTYPE html PUBLIC "-//W3C//DTD XHTML 1.0 Transitional//EN" "http://www.w3.org/TR/xhtml1/DTD/xhtml1-transitional.dtd"><html xmlns="http://www.w3.org/1999/xhtml" xml:lang="en" lang="en"> <head> <meta http-equiv="content-type" content="text/html;charset=UTF-8" /> <title>Slides: <%= controller.action_name %></title> <%= stylesheet_link_tag 'scaffold', 'styles' %> <%= javascript_include_tag 'jquery', 'jquery.sizes', 'jquery.electric-slide', 'jquery-ui' %> </head>
<body>
<p style="color: green"><%= flash[:notice] %></p>
<%= yield %>
</body> </html>
Now we can add the CSS code snippet from above into our app – copy this into a new file called public/stylesheets/styles.css, which we just included above in the layout:
body {
  background:#EEEEDD;
}
.slide {
  display:none;
}
#slides .slide-header {
  display: none
}
#slides .slide-footer {
  margin:0;
  width: 200px;
}
.slide-footer .previous {
  width:75px;
  float:left;
}
.slide-footer .next {
  width:75px;
  float:right;
  text-align:right;
}
And finally replace the scaffolding slide index view, app/views/slides/index.html.erb, with the code from above:
<script type="text/javascript" charset="utf-8">
  $(function(){
      $("#slides").electricSlide();
  })
</script>
<div id="slides">
<% @slides.each do |slide| %>
  <div class="slide">
    <%= image_tag slide.image.url %>
  </div>
<% end %>
</div>
Now start up your server at look for the Mickey slide show at http://localhost:3000/slides!